



How to Prepare Your E-Bike for Seasonal Off-Road Rides
Knowing how to prepare your e-bike for seasonal off-road rides is the difference between a smooth, confident outing and a frustrating breakdown mid-trail. Whether you are heading into summer heat, fall mud, or spring wet roots, each season demands a specific checklist. This guide walks you through exactly what to inspect, adjust, and pack — so your ride starts strong and finishes the same way.

Electric bikes add a layer of complexity that traditional mountain bikes do not have. You are managing a battery, a motor, a controller, and a display — on top of all the mechanical components that need attention anyway. Skipping prep is not just inconvenient; on remote trails, it can be genuinely unsafe.
This guide is organized by system, then by season. Work through it before your first ride of any new season and you will catch 90% of potential issues before they become trailside problems.
Why Seasonal Prep Matters More Than You Think
Most e-bike issues that ruin a ride are not random failures — they are predictable consequences of skipped maintenance. Temperature swings between seasons affect battery chemistry, tire pressure, lubricant viscosity, and even brake pad compound behavior. What worked perfectly in October may be underperforming by March.
There is also the terrain factor. Off-road riding puts significantly more stress on every component than pavement riding. Roots, rocks, mud, and elevation changes accelerate wear on tires, brakes, suspension, and the motor itself. A bike that passed a quick visual inspection in the garage may reveal its true condition within the first mile of a technical trail.
The goal of seasonal prep is not to be obsessive — it is to be systematic. A 45-minute inspection before the season saves hours of frustration (and potentially hundreds of dollars in emergency repairs) later.
Battery: The First Thing to Check Every Season

What to Check
- State of charge: If the bike sat over winter, the battery may have self-discharged. Never store or charge a lithium battery that has dropped below 20% for extended periods.
- Physical condition: Inspect the casing for cracks, swelling, or corrosion on the contacts. Any swelling is a serious warning sign — do not ride with a swollen battery.
- Charge cycle behavior: Charge to 100% and observe. Does it reach full charge normally? Does the charger indicator behave as expected? Unusual charging behavior often signals cell degradation.
- Range test: On your first ride of the season, note your actual range vs. expected range. A significant drop (more than 15-20%) suggests the battery may need professional assessment.
Why Temperature Matters
Lithium batteries lose capacity in cold weather — sometimes significantly. A 52V 20Ah battery that delivers 90 miles of range in 70°F conditions may deliver noticeably less in 35°F. This is normal chemistry, not a defect. The practical implication: plan shorter rides in cold weather and carry a partial charge buffer.
Storage Best Practice
If you stored the battery separately over winter (which is recommended), bring it to room temperature for at least 2 hours before charging. Charging a cold lithium battery accelerates degradation.
Tires and Tire Pressure for Off-Road Conditions

Pressure Is Everything
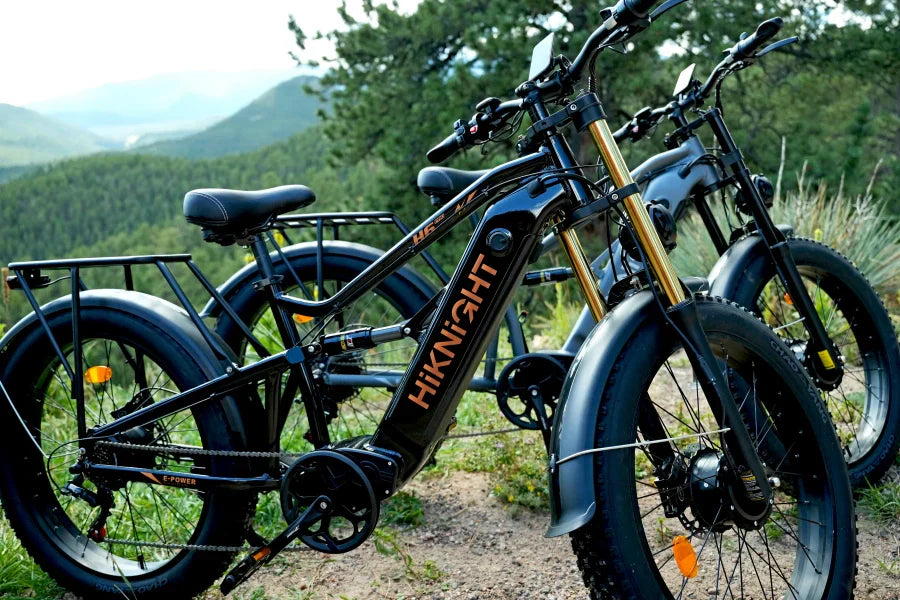
Tire pressure is the single most impactful variable you can adjust for free. Off-road riding on fat tires (4.0-inch width is common on capable e-bikes) typically calls for 8-15 PSI depending on terrain and rider weight — far lower than road tires. Running too high reduces traction and makes the ride harsh. Running too low risks pinch flats and rim damage.
General starting points for fat tire off-road riding:
- Hard-packed dirt / gravel: 12-15 PSI
- Loose dirt / roots / rocks: 10-12 PSI
- Mud / sand / snow: 6-10 PSI
- Heavier riders (over 220 lbs): Add 2-3 PSI to each range
Seasonal Pressure Shifts
Temperature affects tire pressure. For every 10°F drop in temperature, tires lose approximately 1 PSI. A tire set at 12 PSI in summer may read 9-10 PSI on a cold fall morning. Always check pressure at the trailhead, not just in the garage.
Tread and Sidewall Inspection
Look for cracking in the sidewalls (common after UV exposure or cold storage), embedded debris, and uneven wear patterns. Uneven wear often indicates a wheel alignment or suspension issue worth investigating before the season begins.
Suspension Setup and Inspection

Why Suspension Needs Seasonal Attention
Suspension oil thickens in cold weather and thins in heat. A fork that felt perfectly tuned in summer may feel sluggish and unresponsive in early spring. Conversely, summer heat can cause air-sprung forks to lose pressure faster than expected.
What to Inspect
- Stanchion condition: Look for scratches, pitting, or oil residue on the fork legs. Light oil film is normal; heavy leaking is not.
- Sag setting: With full riding gear on, sit on the bike in your normal riding position. Sag (how much the suspension compresses under your weight) should be 20-30% of total travel for most off-road riding. Adjust air pressure or preload accordingly.
- Rebound speed: Push down on the fork or rear shock and release. It should return smoothly and at a controlled pace — not snap back instantly (too fast) or creep back slowly (too slow).
- Pivot bolts (rear suspension): On full-suspension bikes, check that all pivot bolts are torqued to spec. Loose pivots create slop that feels like frame flex and accelerates bearing wear.
When to Service
Most suspension manufacturers recommend a lower-leg service every 50 hours of riding and a full service every 100-200 hours. If you rode heavily last season, the start of a new season is a natural service interval.
Brakes: Non-Negotiable Before Any Trail Ride
Pad Wear
Brake pads on e-bikes wear faster than on traditional bikes because of the additional weight (motor, battery, frame). Most hydraulic disc brake pads have a wear indicator — check it. If you cannot see it, measure the pad thickness. Less than 1.5mm of compound remaining means replacement before the season starts.
Rotor Condition
Rotors should be flat, free of deep grooves, and within minimum thickness spec (usually stamped on the rotor itself). A warped rotor causes brake pulsing that is both annoying and reduces stopping power on technical descents.
Hydraulic Fluid
Hydraulic brake fluid absorbs moisture over time, which lowers its boiling point. On long descents with an e-bike's added weight, this can cause brake fade. If your brakes feel spongy or the lever pulls closer to the bar than it used to, a bleed is likely overdue.
Bedding In New Pads
If you install new pads, bed them in before hitting technical terrain. Find a flat area, accelerate to moderate speed, and apply firm (not emergency) braking to a near-stop. Repeat 10-15 times. This transfers an even layer of pad material to the rotor and dramatically improves initial bite.
Drivetrain and Motor Health Check

Chain and Cassette
Measure chain stretch with a chain wear indicator tool. A chain at 0.75% stretch should be replaced. Running a worn chain accelerates cassette and chainring wear — a much more expensive repair. After replacement, clean and lubricate with a wet lube for muddy conditions or a dry lube for dusty summer trails.
Motor Inspection
Hub motors and mid-drive motors both benefit from a visual inspection at the start of each season. Look for:
- Unusual play or wobble in the motor axle
- Corrosion on motor housing or cable connections
- Any grinding or clicking sounds during a slow test ride
Most sealed hub motors require no internal maintenance, but the axle nuts should be checked for proper torque — especially after a season of rough riding.
Cable and Connector Check
Inspect all electrical connectors for corrosion, bent pins, or loose connections. Off-road riding vibrates connections loose over time. A connector that is 90% seated may work fine on pavement but fail intermittently on a rough trail.
Lights, Display, and Electronics

Display Calibration
After a season of riding, verify that your display is reading battery percentage accurately. A display that shows 50% when the battery is actually at 30% is a real problem on a remote trail. If your display has a reset or calibration function, run it at the start of the season.
Lights
Check both front and rear lights for function, brightness, and mounting security. Off-road vibration loosens mounts over time. If you ride in low-light conditions (early morning, evening, or tree cover), lights are safety equipment — not optional.
Firmware Updates
Some e-bike systems support firmware updates that improve motor response, battery management, or display accuracy. Check the manufacturer's app or website at the start of each season for available updates.
Season-by-Season Specifics: What Changes and When

Spring
Spring is the highest-risk season for e-bike components. Wet trails, mud, and temperature swings create conditions that accelerate wear and expose any maintenance gaps from winter storage. Priority items: full drivetrain clean and re-lube, brake inspection, battery capacity test, and a thorough connector check for corrosion from winter humidity.
Summer
Heat is the enemy of battery longevity. Avoid leaving your e-bike in direct sun for extended periods, and never charge a battery that is hot from riding — let it cool to ambient temperature first. Tire pressure rises in heat, so check it more frequently. Dry conditions call for a dry chain lube to avoid attracting dust.
Fall
Wet leaves are among the most treacherous surfaces an off-road rider encounters — more slippery than ice in many conditions. Reduce tire pressure slightly for better grip, and verify brake performance before heading into leaf-covered descents. This is also the time to start thinking about battery storage if you plan to reduce riding frequency over winter.
Winter (Where Applicable)
Cold-weather riding is possible on a well-prepared e-bike, but requires specific adjustments. Keep the battery warm before rides (store it indoors, not in a cold garage). Use a wet or wax-based chain lube that does not freeze. Reduce tire pressure for snow traction. Expect reduced range — plan routes accordingly.
Rider Gear and Trail Essentials

Bike prep is only half the equation. What you carry on the trail determines whether a minor issue becomes a walk-out situation.
Minimum Trail Kit
- Tire repair: Tubeless plug kit or spare tube, tire levers, and a pump or CO2 inflator
- Multi-tool: At minimum, hex keys in 4mm, 5mm, and 6mm sizes cover most e-bike adjustments
- Chain tool and quick link: A broken chain ends a ride without these
- Spare connector or electrical tape: For loose or damaged cable connections
- Phone with offline maps: Cell coverage on trails is unreliable
- Water and nutrition: E-bikes make it easy to cover more distance than expected — carry more than you think you need
Seasonal Gear Adjustments
In spring and fall, add a lightweight waterproof layer. In summer, prioritize sun protection and extra water. In winter, hand warmers and a thermal layer for the battery (some riders use neoprene covers) make a meaningful difference in both comfort and battery performance.
Frequently Asked Questions
How often should I do a full e-bike inspection?
At minimum, once per season — ideally before your first ride of each new season. If you ride frequently (more than 2-3 times per week), a quick visual check before each ride and a more thorough inspection monthly is a reasonable cadence.
Can I ride my e-bike in the rain?
Most off-road e-bikes have an IP rating that allows riding in rain and wet conditions. However, avoid submerging the bike or pressure-washing electrical components. After wet rides, dry the bike and apply a light lubricant to the chain before storage.
How do I store my e-bike battery over winter?
Store the battery at 40-60% charge in a cool, dry location between 50-70°F. Avoid freezing temperatures and direct heat sources. Check the charge level every 4-6 weeks and top up if it drops below 30%.
What tire pressure should I use for muddy trails?
For muddy conditions on fat tires (4.0-inch width), start around 8-10 PSI. Lower pressure increases the contact patch and improves grip in soft terrain. Adjust based on rider weight and how the bike feels — there is no single correct answer.
How do I know if my e-bike motor needs service?
Warning signs include unusual grinding or clicking sounds, reduced power output that is not explained by battery charge level, error codes on the display, or physical play in the motor axle. Most hub motors are sealed and require professional service if internal issues are suspected.
Is it safe to ride an e-bike in cold weather?
Yes, with appropriate preparation. Keep the battery warm before and during rides, expect reduced range (plan accordingly), use cold-appropriate lubricants, and reduce tire pressure slightly for better traction on cold or icy surfaces.
How long does a seasonal e-bike prep take?
A thorough seasonal inspection typically takes 45-90 minutes if you are doing it yourself. If you are sending the bike to a shop for a full service, allow 1-2 weeks during peak season (spring and fall) when shops are busiest.
Do fat tire e-bikes need different maintenance than regular e-bikes?
The core maintenance is the same, but fat tires require more attention to pressure management given the wider range of appropriate PSI for different terrain types. The larger tire volume also means pressure changes are less immediately obvious — use a gauge rather than relying on feel.



Leave a comment
All comments are moderated before being published.
This site is protected by hCaptcha and the hCaptcha Privacy Policy and Terms of Service apply.